Installation Detail
Ceiling Tile Pattern Direction Through Cuts and Service Access
A practical method for keeping a directional ceiling finish consistent when panels move from full bays to border cuts and later service access.
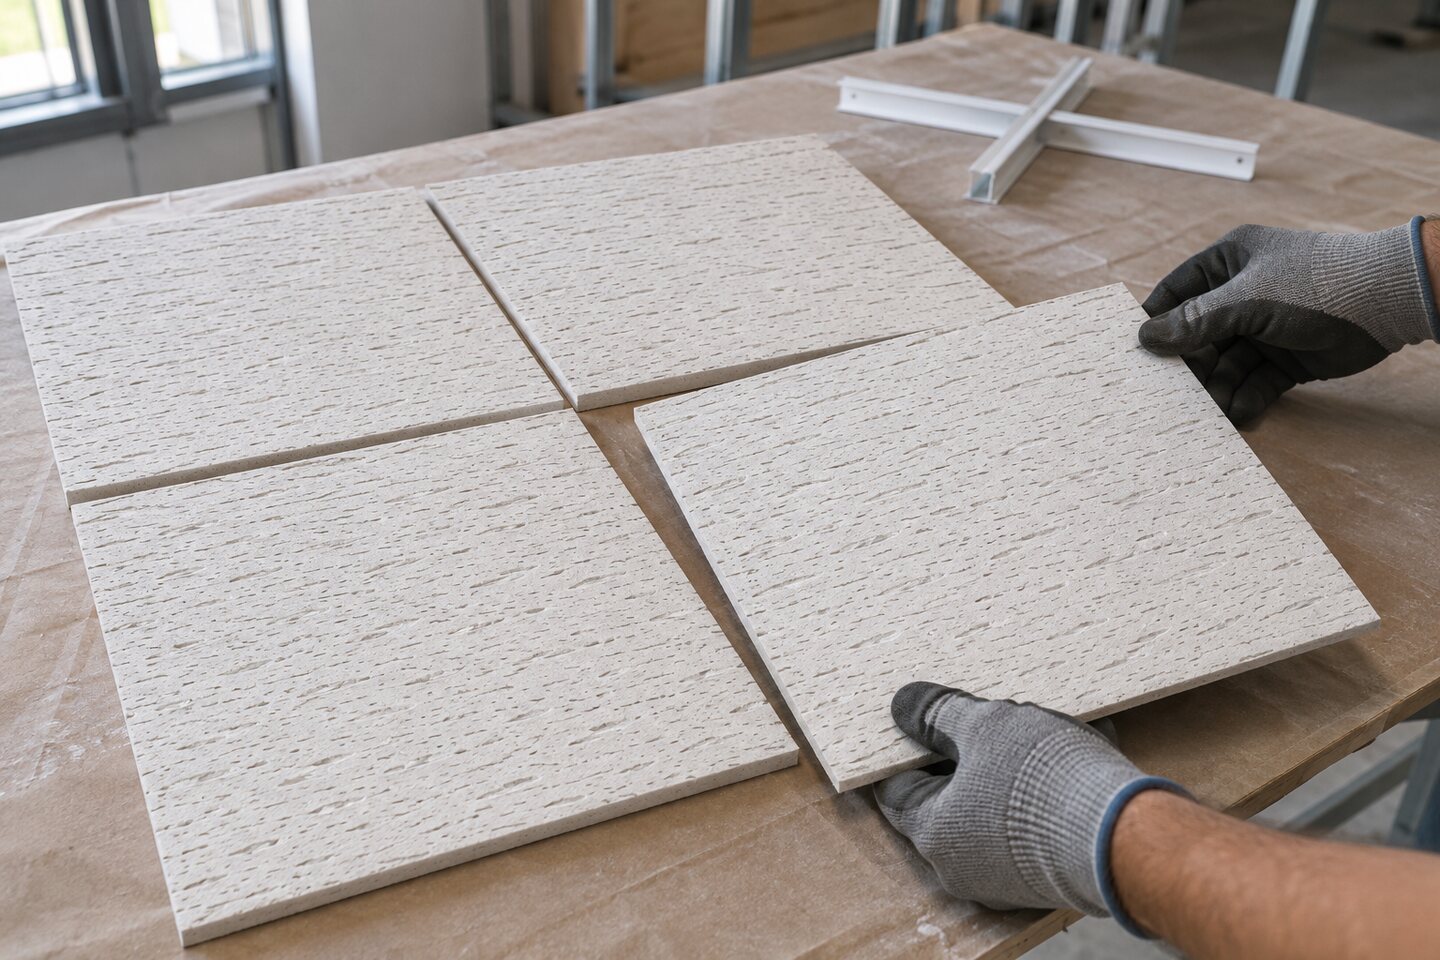
Four panels can reveal what one sample hides
A single white panel is a poor guide to a repeated ceiling surface. Set several beside each other and a faint grain or elongated fissure can become easier to read. Rotate one panel and compare again. Ceiling tile pattern direction deserves this small check while the material is still on a protected bench, before a roomful of panels makes an unresolved finish decision visible overhead. This applies where the selected product has a directional finish or a specified orientation. Do not assume that every mineral fiber tile needs the same treatment. Ask for the installation information for the exact model, then establish whether there is a prescribed direction, an approved visual arrangement, or no directional requirement. A square outline alone cannot answer that question.
Read the product instruction before choosing a room axis
Chengyu lists surface pattern among the details buyers should confirm for mineral fiber ceiling board, alongside size, thickness, edge and matching grid. Add a direct question to that enquiry: does this selected pattern require a particular orientation, and how is that orientation identified? Obtain the answer against the model or approved sample rather than against a general photograph of white tiles. Manufacturer instructions illustrate why the answer must stay product specific. Armstrong describes its Create! panels as directional and instructs installers to keep the marked arrows facing the same way. That is an instruction for that named range, not evidence that Chengyu panels carry equivalent markings. For the material actually supplied, use its own instructions and agreed reference. If no direction information is available, resolve the visual arrangement with the supplier and project team before repeated installation.
Give the crew a reference that survives a change of viewpoint
Once the requirement is understood, describe the agreed orientation against something fixed in the room. The entrance wall or a numbered drawing axis is easier to communicate than left, right or forward. Two installers standing on opposite sides of a bench can interpret those words differently. A simple ceiling-plan note should let either person recover the intended direction without finding the person who approved it. Compare several panels under representative room lighting and from the positions where the completed ceiling will normally be seen. Keep this review separate from approval of the grid layout or tile edge. The question here is the repeated surface arrangement. Photograph the accepted group with its room reference recorded in the accompanying file. Where the product has back markings, include a separate record of how those markings relate to the accepted face direction.
Carry the same decision into the cutting area
A border piece can fit its opening perfectly and still face a different way from the full panels beside it. Before measuring a cut, identify its intended bay and the orientation required there. Keep that information with the piece while it moves from the bench to installation. Follow the selected panel instructions for cutting and handling; do not mark the visible face as a shortcut. An offcut needs the same consideration. Its remaining dimensions may suit another border, but turning it to save a piece can change the surface arrangement. Check both the usable edge detail and the agreed direction before allocating it. Keep pieces with uncertain identity out of the installation pile until someone can verify them. This avoids asking the person working overhead to reconstruct a cutting decision from the shape alone. For openings associated with services, settle the direction before the opening is transferred to the panel. A rectangular hole can make a later rotation impossible without another cut. The service location and the face orientation should therefore travel together in the cutting instruction. Neither should be inferred from a loose panel arriving at the work platform.
Investigate a different-looking bay before exchanging stock
If a panel appears different in the completed field, compare its orientation with the established reference before concluding that a different batch or model has been installed. Review it from normal viewing positions and check the available product identity. Direction is one possible explanation to examine, not a diagnosis that excludes colour, surface damage, contamination or a genuinely different panel. Avoid rotating panels simply to conceal an unresolved mismatch. Where the manufacturer specifies an orientation, retain it. If product identity or the accepted finish is uncertain, record the affected bay and ask the responsible project team to resolve it. The useful outcome is an explained and accepted ceiling surface, rather than a series of improvised adjustments that the next installer cannot repeat.
Leave an orientation note for the first service visit
A maintenance visit can undo an arrangement that was clear during construction. Before a directional panel is removed for access, record its location and orientation in the work record where practical. Keep removed pieces identifiable while the service work proceeds, then reinstate them according to the applicable product instructions and the room reference. Include that reference with the spare-panel information at handover. For distributors and project buyers, ceiling tile pattern direction is a useful small addition to the product enquiry and installation record. It links the selected surface to a repeatable action at the bench, at the border and after service access, without treating every white square as visually interchangeable.